Author: Artur P. | Powder coating shop owner, 15 years of experience | Reading time: 8 minutes
Powder Coating Orange Peel: Causes and How to Fix It
You pull the part out of the oven. The coating is there — but instead of a smooth, mirror-like surface you see a familiar texture. Uneven, grainy, like someone pressed an orange skin into the finish. On matte powder it’s tolerable. On high gloss — it’s a disaster.
Powder coating orange peel is one of the most common coating defects. In 15 years of running a shop I’ve seen it hundreds of times. And every single time it had one of a few specific causes — none of them were random.

What is powder coating orange peel and why does it happen
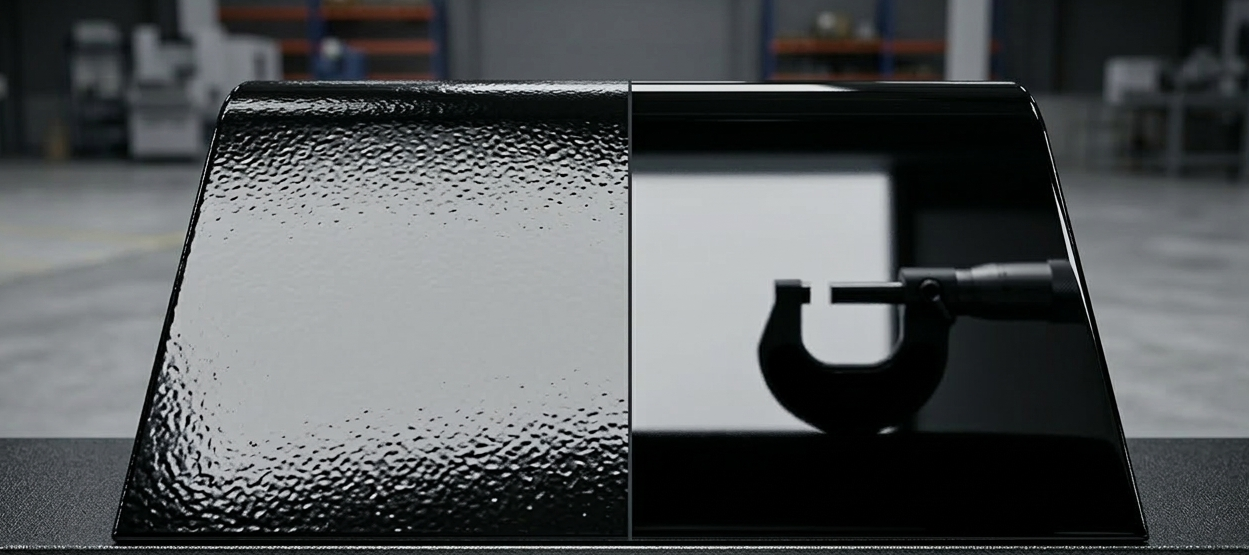
Powder coating orange peel is a surface defect where the coating has an uneven, bumpy texture — the surface looks like citrus skin instead of being smooth. The defect is most visible on gloss and semi-gloss powders, where smoothness is a key quality parameter.
The mechanism is straightforward: during curing, the powder must melt, flow out, and level before it starts to polymerize. If this stage goes wrong — too fast, with too thick a layer, or at the wrong temperature — the coating solidifies before it has time to smooth out.
5 causes of powder coating orange peel — and how to fix each one
1. Coating layer too thick
This is the most common cause — more is not better. A thick layer of powder doesn’t have time to flow out evenly before polymerization. The surface sets with an uneven texture.
Optimal coating thickness is 60–80 μm. Above 100 μm the risk of orange peel increases sharply. Instead of one thick 120 μm layer — apply two thin coats of 60 μm each.
Parameters to adjust:
- Increase gun distance to 10–12 inches
- Reduce powder feed by 20–30%
- Speed up gun movement — optimal speed is 12–16 inches per second
- Measure thickness with a magnetic gauge only after curing — during application you assess the uniformity of the powder cloud visually
2. Oven heating too fast
Powder coating needs time to melt and level before it starts to harden. If the oven heats the part too aggressively — especially in the first phase of curing — the powder polymerizes before it has properly flowed out.
The powder needs time to level — before it starts to harden. For thick steel parts and aluminum castings, extend curing time by 5–10 minutes beyond the powder manufacturer’s recommendation.
Also check whether the oven is overloaded — too many parts at once disrupts air circulation and causes uneven heating. Keep a minimum 4 inch gap between parts.
3. Actual part temperature ≠ oven readout
This is a mistake I see regularly, especially with thick parts. The oven shows 356°F — but a thick steel part at that moment may only be at 284°F. The powder starts to polymerize from the outside before the metal inside has reached working temperature.
Remember thermal mass. Steel 3/8 inch thick heats up several times slower than 1/16 inch sheet metal. If you put them in the oven together, the thin sheet may already be overcooked while the thick part is still at 284°F. That’s exactly where orange peel is born — not because of the powder, not because of the gun, but because of physics.
Always measure the temperature of the part itself, not the oven. An infrared thermometer (pyrometer) is basic shop equipment — costs $30–80, and saves thousands in rework.
Curing time counts from the moment the part reaches working temperature — not from when it entered the oven.
4. Wrong gun application parameters
Too high voltage, wrong airflow, or incorrect gun distance can cause uneven powder deposition — which directly translates to orange peel after curing.
If you see the powder “spiking” or standing up on the part before it even goes into the oven — that’s a sign you’ve pushed the voltage (kV) too high. That’s back ionization — micro-discharges punch holes through the powder layer, which after melting gives a spotted orange peel effect. Fix: reduce voltage by 10–15 kV and increase gun distance.
Optimal parameters for standard RAL powders:
- Voltage: 60–80 kV
- Gun distance: 8–10 inches
- Gun movement speed: 12–16 inches per second
- Pass overlap: 30–50%
For high-gloss powders — use lower voltage (50–60 kV) and greater distance. The powder cloud must be even — any deviation from parameters shows up on the finished coating. Levelling on a gloss powder does not forgive application errors.
5. Powder type — matte vs gloss
Matte and textured powders have a different tolerance threshold than gloss powders. Matte powders require 100–120 μm thickness to achieve the proper effect — with too thin a layer the matte comes out looking semi-gloss. Gloss powders are the opposite — any thickness excess immediately gives orange peel.
For gloss powders: 60–80 μm is not a suggestion, it’s a requirement.

Hot coating technique — for difficult castings and wheel refinishing
For thick aluminum castings, heavy steel parts, and alloy wheel refinishing, standard parameters sometimes aren’t enough. Orange peel appears despite perfect application — because the problem lies in the physics of heating, not in technique. In these cases I use the hot coating method.
Preheat the part to 104–140°F in the oven (set at 140–176°F, time 15–30 minutes depending on thickness). After removal, monitor temperature with a pyrometer. When the part reaches the right range — start application.
Effect: powder applied to warm metal partially starts to melt immediately on contact. Levelling is significantly better, orange peel disappears.
Parameter adjustments for hot application:
- Reduce voltage by 10–15 kV (warm metal accepts electrostatic charge differently)
- Increase distance by 2 inches
- Work faster — you have 5–10 minutes before the part cools down
- Reduce powder feed by 15–20% — the powder cloud deposits more intensively on warm metal
From my shop: aluminum pump housings, 1 inch wall thickness. No standard parameters gave a smooth surface. Hot coating at 113°F solved the problem completely. The customer thought I had switched to a more expensive powder.
Note on corners and recesses: if orange peel only appears in angles — it’s not a thickness or temperature problem, it’s the classic Faraday cage effect. Trying to “flood” corners with more powder always ends with orange peel on the edges.
Get the Powder Coating Practical Guide — $27 →Diagnostic table — find the cause of your orange peel
| Symptom | Most likely cause | Fix |
|---|---|---|
| Orange peel across the entire surface evenly | Layer too thick | Reduce feed, increase distance, speed up movement |
| Orange peel only on thicker sections of the part | Underheating of thick material | Extend curing time, measure part temperature |
| Orange peel on gloss powders, not on mattes | Thick layer + gloss powder sensitivity | Max 80 μm, lower voltage |
| Orange peel randomly on different parts | Overloaded oven, poor circulation | Reduce load, keep 4 inch gaps |
| Orange peel on heavy castings, profiles | Slow heating of thick material | Hot coating technique (104–140°F) |
| Orange peel after switching powder / manufacturer | Different levelling characteristics | Adjust parameters to new powder’s technical data sheet |
Orange peel and powder type
Not every orange peel is a defect. Textured and structured powders by definition have surface texture — that’s the intended effect, not a flaw. The problem only occurs when:
- You’re using a smooth/gloss powder and see texture
- The client specification requires a smooth surface
- The orange peel is uneven — different texture in different areas of the part
On structured and hammer-finish powders, orange peel actually masks minor application imperfections — that’s an added benefit. On high gloss there is zero tolerance.
Step-by-step diagnostic algorithm
Before you change anything in your parameters — identify the cause first. One change at a time, test on a sample before applying to the actual part.
Step 1: Measure coating thickness with a gauge. Above 100 μm — start by reducing thickness.
Step 2: Check actual part temperature with a pyrometer during curing. Below 347°F with a powder rated at 356°F — extend time or check oven circulation.
Step 3: Check oven load. Too many parts at once = disrupted circulation = uneven heating.
Step 4: Check the powder’s technical data sheet — manufacturer’s recommended parameters. Different powder = different parameters.
Step 5: If the problem involves thick parts — try the hot coating technique.
Orange peel and warranty claims — how to handle it
If orange peel appeared on a production batch — don’t panic. First decision: does the part require full coating removal and recoating, or is a touch-up possible.
For gloss powders with visible orange peel over a large area — complete coating removal and recoating is the only option. Spot repairs on gloss powders are visible.
For matte and textured powders with localized orange peel — a spot repair is possible if the texture is similar.
Document the parameters that caused the problem and the ones that fixed it. That’s the foundation for making sure the mistake doesn’t repeat on the next batch.
Summary — powder coating orange peel in 4 points
Powder coating orange peel almost always comes from too thick a layer, a curing error, or wrong application parameters. Optimal thickness for gloss powders is 60–80 μm — no more. Part temperature must be measured with a pyrometer, not read from the oven display. For thick parts, the hot coating technique eliminates the problem completely.
Full application parameters for different powder types, diagnostic tables for all coating defects, and step-by-step procedures are in my practical powder coating guide — 130 pages of knowledge from 15 years of daily shop work.
Get the Powder Coating Practical Guide — $27 →See also:
Leave a Reply